Friday, December 27, 2013

SDS Paths

Although bidirectional path tracing can efficiently render many types of paths, it has a very difficult time rendering specular–diffuse–specular (SDS) effects (such as reflected and refracted caustics) because they can only be sampled with pure light tracing (t = 0) or pure eye tracing (s = 0). Metropolis light transport can render these types of paths much more efficiently because once it discovers one it can use small path mutations to explore similar paths, all in an unbiased way.

While testing these SDS paths in my renderer, I discovered a few other interesting things. First, when using certain algorithms, infinitesimal changes in primary sample space can result in large jumps in path space. These jumps can cause interesting but undesirable artifacts in parts of MLT renders where small-step mutations are key (such as the lighting of the blue sphere in the images below). Second, because bidirectional path tracing is so bad at rendering SDS images, even tens of millions of bidirectional path tracing samples are not enough to to compute an accurate estimate of the average scalar contribution. This can result in MLT renders that are slightly too bright or slightly too dark.

Below are some equal-time renders of a blue sphere inside an acrylic sphere. The first image was rendered using MLT, the second was rendered using MLT with an alternate method of computing an arbitrary orthonormal basis given a surface normal, and the third image was rendered using standard bidirectional path tracing. Both MLT and BPT make easy work of the caustic, but BPT has a hard time rendering the blue sphere, the caustic reflected from the lower left of the acrylic sphere, and other effects. Click the images to compare them at full resolution.

MLT

MLT with obvious mutation discontinuities

BPT

Below are some less converged versions of the images above: 

MLT

MLT with obvious mutation discontinuities

BPT

Sunday, November 10, 2013

Improved MLT

I recently revisited my bidirectional path tracer and found a small bug in my Metropolis implementation. For choosing the location on the image plane I was accidentally using new random numbers instead of the special random numbers from my random number stream. This meant that the eye subpaths were not properly correlated, which was causing a major reduction in image quality. After fixing this bug, the benefits of MLT became much more apparent.

Below are some approximately equal-time renders for comparison, as well as a more converged reference image. The area most improved by the bug fix is probably the reflection on the glass ball. MLT now outperforms bidirectional path tracing everywhere except the dark areas of the image. You can use the lightbox to switch between images.

MLT after bug fix.

MLT before bug fix.

Bidirectional path tracing.

Pure unidirectional path tracing from the camera (s = 0, t ≥ 2).

High quality bidirectional path tracing reference.

Friday, May 10, 2013

Working Metropolis Light Transport

I just finished implementing Metropolis light transport (MLT) in my bidirectional path tracer. I will post more details later, but for now here's a very rough, quick summary and a few early test renders.

Rather than implementing Veach's path space MLT as I had originally planned, I decided to implement primary sample space MLT based on the paper by Kelemen et al. This algorithm works by mutating points in the "primary sample space", the space of random numbers that drive a Monte Carlo renderer.  Each point in this space maps to a particular path, and mutations in this space correspond to mutations in path space. The algorithm is very general because it works by manipulating the random number stream that drives the renderer rather than manipulating the paths themselves. Mutating paths directly can be relatively tricky.

A lot went into implementing MLT. I wrote a nice random number stream system, with lazy evaluation of random numbers and mutations. I made some significant modifications to my bidirectional path tracing core so that MLT could be added in an elegant way. I made a method to compute an approximate average scalar contribution for the entire image using a Halton sequence to distribute samples over the image (I use this when normalizing the results of the Metropolis sampling algorithm). And of course I implemented the Metropolis–Hastings algorithm.

In my renderer, bidirectional path tracing can now be run with or without MLT. Furthermore, I can continue adding features to the underlying bidirectional path tracer and they will automatically work with MLT enabled.

There are a number of optimizations that I plan to add to improve the rate of convergence, but for now I'm satisfied that the algorithm is working correctly and converges to the same results as regular bidirectional path tracing. MLT currently converges more slowly than bidirectional path tracing alone in most cases, but this should be fixed with a little more work. I also want to do some more testing.

Here are some early test renders. Click the images to view them at full size.

Kelemen MLT on top of bidirectional path tracing.

Bidirectional path tracing without MLT. Same number of samples as the image above.

A longer MLT render.

High quality bidirectional path tracing reference.

An MLT render with only local (small step) mutations. This image shows the expected streaky and clumpy artifacts that result from locally exploring the space.

An MLT render with only global (large step) mutations. Same number of samples as the previous image.

An MLT render with both types of mutations. Same number of samples as the previous image.

A close-up of a caustic rendered using MLT. While many parts of the image are noisier than the bidirectional path tracing version below, the bright caustic on the floor and wall are more converged.

A close-up of a caustic rendered using bidirectional path tracing, with the same number of samples as the image above.

Thursday, May 2, 2013

Complete MIS and Optimizations

I finished my multiple importance sampling (MIS) implementation by adding the one missing piece: correct evaluation of the probability density with respect to solid angle of sampling a particular direction from the sensor. I also added a few other important optimizations: Russian roulette for subpath termination, Russian roulette for connecting edge visibility tests, and light emission samples chosen according to the distribution of power over multiple lights. I tested everything very carefully along the way. An important variance reduction technique that I haven't yet implemented is support for special direct illumination strategies.

Below are two images that used the same number of samples and took the same amount of time to render. The difference is that one was rendered with MIS and the other was not (it was rendered by simply weighting the contribution of each path by one over the number of possible sampling techniques for a path of that length). These images illustrate how important MIS is for bidirectional path tracing. The remaining fireflies and severe noise in the MIS image are a result of rare SDS paths that bidirectional path tracing has trouble with. I will soon be implementing MLT in this renderer to help render these types of paths.

Bidirectional path tracing with MIS.

Bidirectional path tracing without MIS.

Monday, April 15, 2013

Microfacet BSDF for Reflection and Refraction

Last year I implemented (see my blog posts here and here) a microfacet model for reflection and refraction based on the 2007 paper by Walter, Marschner, Li, and Torrance. In order to port my implementation of this BSDF to my bidirectional path tracer, I needed to add a few features and make a few fixes. In particular, I needed to scale the radiance of light that is transmitted across the interface, I needed to prevent bad reflection and refraction directions, and I needed to add the ability to evaluate the probability density of sampling a given direction. I also had to track down and fix a couple minor bugs. After making these additions and fixes, the BSDF works great.

The following images compare the results of the microfacet BSDF and a simple ideal specular BSDF. They match very closely, as they should.

Glass balls using the microfacet BSDF with very low roughness, rendered in my bidirectional path tracer.

Glass balls rendered using ideal specular reflection and refraction, rendered in Photorealizer.

Of course, the cool thing about the microfacet BSDF is that it can be used for rough surfaces, not just smooth ones. For the following image I used the microfacet BSDF for both of the glass spheres. I modulated the roughness of the left sphere (between smooth glass and ground glass) using a procedural texture map. The roughness of the right sphere is in between the two roughness values used on the left sphere.

The glass spheres use the microfacet BSDF for reflection and refraction.

Here's another image that uses this BSDF with a fairly low roughness:

The glass monkey on the right uses the microfacet BSDF for reflection and refraction.

A close-up of the rough glass monkey.

Notice that, while these images are quite smooth overall, there is still some noise in the glass objects. This is because bidirectional path tracing cannot efficiently handle tricky SDS (specular–diffuse–specular) paths (in other words, reflected and refracted caustics). I am planning on implementing MLT soon, which will allow me to better handle these types of paths.

Disney Principled BSDF

I implemented the diffuse and specular parts of the Disney "principled" BRDF (slidesnotes), a new multipurpose analytic BRDF from Walt Disney Animation Studios, created for Wreck-It Ralph and designed to match MERL measured data. The results look great. Below are a few images that I've rendered in my bidirectional path tracer using this BRDF.

For the following image I used the Disney "principled" BRDF for all of the surfaces except the two glass balls (and the lights and sensor).

An image I rendered in my bidirectional path tracer. All of the surfaces except the glass balls use the Disney "principled" BRDF.

For the following image, I used the Disney "principled" BRDF for the two monkeys in the middle, the wood and green plastic ones.

An image I rendered in my bidirectional path tracer. The wood and green plastic monkeys use the Disney "principled" BRDF.

A close-up of the wood and green plastic monkeys.

As usual, I haven't post-processed these images in any way outside my renderer, and you can click them to view them at full size.

Diffuse Reflection and Transmission BSDF

My improved BSDF system is very general and makes it really easy to add new BSDFs that contain any kind of reflection and transmission. To test this, I implemented a constant BSDF of 1/(2Ï€). It's defined over the entire sphere, so it diffusely reflects half of the incident light and diffusely transmits the other half.

I rendered the image below in my bidirectional path tracer. The blue monkey on the left uses this new constant BSDF, giving it a soft and translucent appearance (putting a light behind the monkey would illustrate the translucency better). My next couple blog posts will describe the BSDFs I used for the other monkeys in this image.

The blue monkey on the left uses this constant-valued, reflecting and transmitting BSDF.

A close-up of the blue monkey.

Sunday, April 14, 2013

Multiple Light Sources

I added support for multiple light sources to my bidirectional path tracer. For now, when selecting an origin light for the light subpath, all of the lights are chosen with equal probability, but I will soon make the probability of selecting a particular light proportional to its total emitted power.

One light source.

Two light sources, same total power.

Two different colored light sources, same total power.

All of the Sampling Techniques for Paths of Length Two

In bidirectional path tracing, for any path of length k, there are k+2 sampling techniques. Each of these sampling techniques could be used to create exactly the same image, but certain sampling techniques are better at finding certain types of paths. We don't know ahead of time which sampling technique will be the best one for a particular scenario, so instead we use all of the sampling techniques and then combine their results using multiple importance sampling (MIS).

In my bidirectional path tracer I have implemented all of the k+2 sampling techniques for every path length k. Below are renders showing the 4 sampling techniques for paths of length 2. In the captions, s is the number of light subpath vertices in the path and t is the number of eye subpath vertices in the path.

s = 3, t = 0 (direct sensor hits)

s = 2, t = 1 (light tracing with direct sensor sampling)

s = 1, t = 2 (path tracing with direct light sampling)

s = 0, t = 3 (direct light hits)

k = 2, no MIS

k = 2, MIS (correct result but still needs a couple tweaks to be fully tuned)

Saturday, April 13, 2013

Working Bidirectional Path Tracing with MIS

I've successfully implemented bidirectional path tracing. There are still a number of optimizations and other features that I would like to implement, but most of the difficult parts are finished and the core algorithm is working correctly.

I've almost finished implementing multiple importance sampling (MIS). There's just one thing still missing from my MIS implementation: a correct PDF for sensor emission directions. This causes, for example, the contribution of light tracing to be lower than it should. I will fix this soon. For now, renders still converge to the correct result, but they converge a little more slowly than they should.

There were lots of tricky things to work though and bugs to fix along the way to this point. As of now, I've skipped over a lot of that stuff in this blog, but I might go back and add some more details later. For now, feel free to let me know if you have any questions about implementing bidirectional path tracing.

Bidirectional path tracing without MIS.

Bidirectional path tracing with MIS. Same number of samples as the image above.

Photorealizer reference (path tracing with direct illumination).

Sunday, March 17, 2013

Light Tracing

The typical approach to global illumination rendering using ray tracing is to trace rays from the camera and gather radiance from the light sources. This approach is used to solve the light transport equation (a.k.a. the rendering equation). This is usually what the term "path tracing" refers to. Here's the formulation of the light transport equation that Veach uses in his thesis (see chapter 3, specifically page 90):

\[ L_{\text{o}}(\mathbf{x},\, \omega_{\text{o}}) \,=\, L_e(\mathbf{x},\, \omega_{\text{o}}) \ +\, \int_{\mathcal{S}^2} L_{\text{o}}(\mathbf{x}_\mathcal{M}(\mathbf{x},\, \omega_{\text{i}}),\, -\omega_{\text{i}}) \, f_s(\mathbf{x},\, \omega_{\text{i}} \rightarrow \omega_{\text{o}}) \, d \sigma_{\mathbf{x}}^{\perp} (\omega_{\text{i}}) \]

It's also possible to trace rays from the light sources and gather importance from the camera. This approach is used to solve the importance transport equation. This approach is sometimes called "light tracing". Here's the formulation of the importance transport equation that Veach uses in his thesis (see chapter 3, specifically page 91):

\[ W_{\text{o}}(\mathbf{x},\, \omega_{\text{o}}) \,=\, W_e(\mathbf{x},\, \omega_{\text{o}}) \ +\, \int_{\mathcal{S}^2} W_{\text{o}}(\mathbf{x}_\mathcal{M}(\mathbf{x},\, \omega_{\text{i}}),\, -\omega_{\text{i}}) \, f_s(\mathbf{x},\, \omega_{\text{o}} \rightarrow \omega_{\text{i}}) \, d \sigma_{\mathbf{x}}^{\perp} (\omega_{\text{i}}) \]

Solving the importance transport equation relies on the ability to map a point and direction on the camera's lens/aperture/sensor to a point on the image plane, and the ability to evaluate the emitted importance for a given point and direction. Evaluating the emitted importance is a little tricky because it is not constant across the image plane—it is necessary (at least in my formulation) to take into account factors like the area of the aperture, the angle at which the light passes through the aperture, the distance from the aperture to the image plane, the angle at which the light hits the image plane, and the area of the image plane. 

For many typical scenes light tracing is very slow compared to path tracing from the camera, however it is much faster for rendering certain types of transport paths (e.g., caustics). Bidirectional path tracing is a generalization of both of these techniques that forms paths based on all of the possible combinations of two subpaths: one traced from the light and one traced from the sensor/eye.

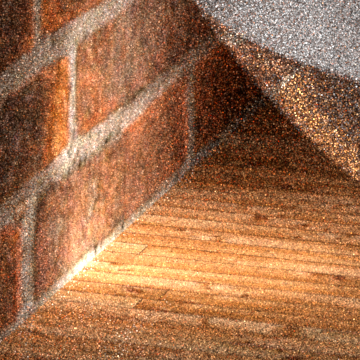
Bidirectional path tracing uses many parts of light tracing (e.g., originating rays from light sources, evaluating the importance emitted from sensors), so I decided to implement light tracing before full bidirectional path tracing. I rendered one of the images below using light tracing, and the second with path tracing. I rendered the light tracing version in my new renderer (which is a revamped version of Photorealizer), and the path tracing version in Photorealizer. These images contain only paths of length 2, and they are identical (apart from the noise) as they should be.

Light tracing (starting on the light and gathering importance)

Path tracing (starting on the sensor and gathering radiance)

Sunday, March 10, 2013

First Steps Towards Bidirectional Path Tracing

I began my implementation of bidirectional path tracing by making a streamlined version of my existing renderer, Photorealizer. I removed little-used features, removed the core recursive path tracing code, cleaned up some of the code, and optimized some of the code. Then I added the following features:

Light and sensor geometry in the scene. Lights and sensors (i.e., the camera lens) are now associated with objects in the scene, just like other geometry. They can be stored in the same spatial data structures and intersected using the same methods as regular geometry. This is important for implementing bidirectional path tracing, and it is conceptually more similar to Veach's formal, mathematically rigorous definition of a scene.
• Unbiased image sampling and filtering. Now I can sample the image plane in any way I want (e.g., stratified sampling) regardless of the arrangement of pixels, and reconstruction filters can be any size and shape. Previously, I was using the common technique of reconstructing samples into pixels using a weighted average based on the filter weights at the samples (as described on page 308 in Veach's thesis, and in the book Physically Based Rendering).
• More robust BSDF system. Each BSDF now exactly follows the conventions of BSDFs as described by Veach (and others).  Reflection and transmission are now both handled in a unified way, so any BSDF can contain reflection or transmission. Each BSDF returns the value of the PDF when sampled. And I no longer have to flip the surface normal to be on the same side as the incident direction.
• Improved scene traversal and intersection system. I made a more robust system for preventing self-intersections, along with some performance improvements and code structure changes.
• Different materials for different instances. Each instance of a model in the scene can have can have its own material. More generally, I gave containers in my scene hierarchy the ability to override the materials of the objects within them.
Flexible texture mapping system. Any material property can now be texture-mapped easily. These properties can be set to either a 2D or 3D varying texture or a uniform color, which are all descendants of the same abstract texture class.
• Custom linear algebra library. I incorporated a new templatized linear algebra library that I wrote from scratch. The code is much cleaner than what I was using before, because there is only one vector class template and one matrix class template, and most of the operations are written as loops over the components (which I could potentially parallelize in the future).

An early test render showing the aperture geometry (the black hexagon).

Friday, March 1, 2013

New Project

I am implementing bidirectional path tracing (BPT) and Metropolis Light Transport (MLT) as an independent study project at Penn.

I finished thoroughly reading and understanding Eric Veach's PhD thesis (and some other resources, which I'll talk about later), and now I'm moving on to the implementation. After working through Veach's thesis, I feel like I have a much deeper understanding of the rigorous mathematical theory behind rendering, as well as a strong understanding of the algorithms that I will be implementing. And I think that the math I've learned (in particular, some relatively advanced probability and calculus) will be useful outside the context of rendering, in a wide variety of subject areas.

I'm planning on making some progress on the implementation over spring break. I think the implementation will go pretty smoothly since I've already put much effort into learning and planning.

Adding bidirectional path tracing and MLT directly to my existing renderer Photorealizer would be very difficult because it would require significant refactoring of the path tracing core, and significant effort to integrate with the many existing features. Instead, I will start by creating a new, streamlined version of Photorealizer. Bidirectional path tracing and MLT will be relatively difficult to implement correctly, so I will first focus on implementing them well, making them work perfectly, and making the code clean, fast, and extensible. Then later I can add extra features.

I will start by implementing bidirectional path tracing, making both sensors and lights part of the scene, writing utilities for creating paths from both sensors and lights, manipulating paths, computing the correct contribution of paths, using multiple importance sampling to weight the paths in an optimal way, and more. Then I'd like to add support for participating media (which isn't covered in Veach's thesis, but has been derived by others). Once bidirectional path tracing is complete, I will then be able to implement MLT. Like bidirectional path tracing, MLT uses the path integral formulation of light transport. Furthermore, MLT uses bidirectional path tracing directly to create seed paths, and it uses bidirectional path tracing concepts to mutate paths.

I plan to post more specific implementation details, progress updates, and pictures on this new blog.